step 2: Buy glitter. Lots and lots of glitter. Throw in a bit of paper, some paintbrushes, glitter glue (yes, they make glue specifically for glitter), and get your addresses in order. (I promise you are missing a few.)
step 3: Cut the 1944 cards apart with the front page separated from the rest of it. Sometimes you can get multiple "front pages" out of one card.
step 3: Resize store bought blank stationery to fit the 1944 cards, because they are sooo not the same size. You will probably need to figure out how to rip in a straight line, since the blank stationery doesn't have a straight edge. Don't mess up! (You may think you have more cards than you need, but you are sooo wrong!)
step 4: Find the envelopes you used for thank you notes when you got married, since you never used them all. (Plus, they are made out of fancy, thick, textured paper that matches your the stationery you are gluing the 1944 Christmas cards to.)
step 5: Figure out how to type your home address on the envelope flap so that it is centered with a typewriter. Get your husband's help, because he's good at math and you don't feel like wasting tons of expensive envelopes (or your time).
step 6: Type your address on the back of 40-some-odd envelopes thinking that is enough (or too much) since you only bought 30 cards on ebay.
step 7: Glue the front of the old 1944 cards to the front of your new cards. Hopefully it looks pretty.
tip: Rubber cement the back of the image and the front of the card where you want the image to go. Wait until the rubber cement FULLY dries. When you go to place the image on the card, you will be able to move it around like a sticker if you mess up. (Also, don't ask Justin to show you this technique.)

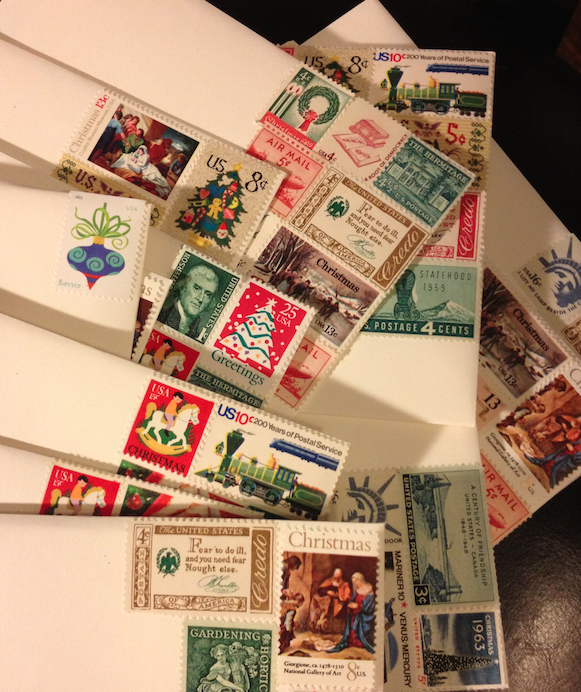
step 8: Pull out all of your stamps. Since you are using older "vintage" stamps, you will need to add up the cost of postage for each envelope. Plus, you will want to pick color schemes that match your cards. This will only take a few hours.
step 9: Get the husband to tie ribbon around some of the cards to dress them up. Discover that despite having taught you how to tie a perfectly flat ribbon on wedding invitations, he has somehow lost that skill. Realize that you will be doing the tying –along with everything else that makes these cards special and unique– by yourself

step 10: Time to glitter! Screw up the first few cards with too much glitter before you decide to make a trip to Wal Mart to buy paint brushes. Use aluminum foil and put the tiniest bit (not too tiny!!) of glitter on it. (Use different color glitters if you have them.) Water down the glitter glue so that not all of the glitter sticks to the card. (Too much glitter looks like a 4 year old did it!) Tap your paintbrush in the glue, dab the brush on a paper towel (or foil) to get most of the glue off and then stick the brush in the glitter. Paint on your card. Smaller brushes give you finer detail and fan brushes allow you to create specks of falling snow.
step 11: Write something sweet in all of the cards.
step 12: … After 4 days of working on the cards, be excited to finally finish! Put everything up. Then receive an e-mail with 2 more addresses and realize you have to pull it all back out again. *groan*
step 13 (the most important): Be unable to sleep and go crazy because the dining room is a wreck until you finish. Stress out. Pull your hair out. Scream. Cry. Wish you had started this project 5 weeks earlier. Then be glad you finished before your husband completed his 3-day holiday cake. ;)
I think I'm going to fall asleep now. :) Maybe I'll show you some of the DSLR card images after Christmas.