Things I Learned While Photographing European Landscapes


I didn't realize when I started this week that all of my blog posts would be about travel … and that they would all be lists! I'm more or less taking a break this month and not stressing about blog posts. I hope my travel lists have been informative and helpful. If not – there are only a few more days left until the end of the month, and then I get to adjust myself and this blog to a brand new schedule!

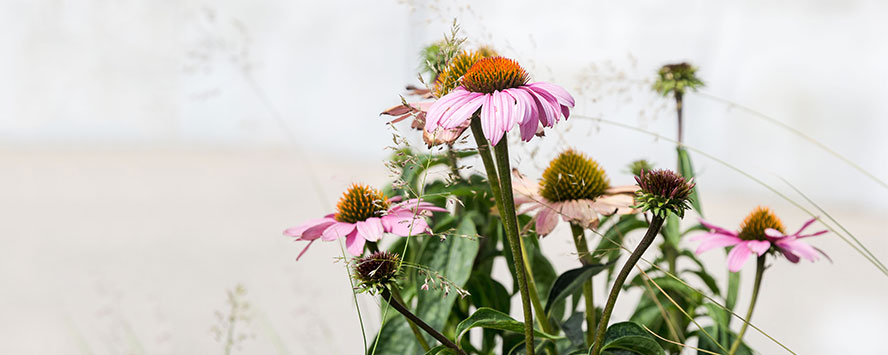
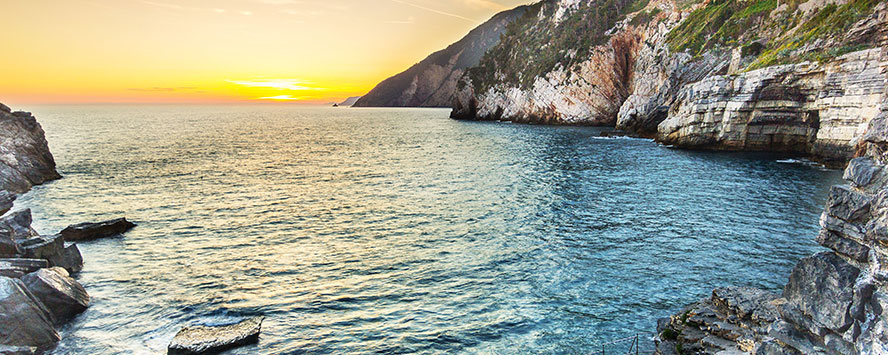
1.When taking a photo, follow the thirds rule. (The picture above would be much better and more interesting if I had done that.)  Once you spot a landscape you want to photograph, decide which is more detailed and beautiful – the sky or the landscape. Whichever is most important should take up 2/3 of your image with the other taking up only 1/3. If you aren't sure which area is more visually appealing, take both pictures and decide later. :) NEVER shoot 1/2 and 1/2 like I did unless you plan on editing later.

2. Check your shutter speed and aperture. Lower your ISO as low as you can comfortably go. A low ISO means you will have less grain in your images, but if it results in a lower aperture setting or shutter speed than you can comfortably get holding your camera, you might be better off going with a higher ISO. It's really a trade off. This blog post isn't really a lesson in photography though. I really just want you to remember to check and double check your settings. If you were last shooting late at night, you could get some really over exposed images (read: trash).

3. Slow down. Focus. Visualize your image. Even if you are with a group and going at a hectic pace, it is always best to make your first shot count, especially if it is the only shot you get. Don't count on photoshop to save your butt. And if you have a camera lens that lets you manually focus, be certain to check that you are manually focused or that the setting is on for automatic focus if focusing automatically is what you want to do.

4. Polarizers are way cool! I only bought one for my wide angle, but I definitely regretted that decision. I used my polarizer for almost every shot! Buy a polarizer to use for whichever lens you use most often if you have any intention on shooting landscapes. My husband even used the polarizer when shooting with his iphone! :)

5. My canon 24-70 lens is simply amazing. If you don't have a good generic lens, I recommend investing in one. It focused quick, the images were sharp, and nearly everything looked better when I shot using this lens.

What is your best travel photography advice? Do you agree with anything I've said? Can you think of anything to add to my list?

My Camera Bag

Now that my trip to Europe is quickly creeping up on me, I'm trying to make sure I am prepared for whatever is to come. I've been assembling my camera gear and watching CreativeLive to make sure I have the equipment and skills necessary to accomplish my goals of taking fantastic photos.

Here's what I have:

JoTotes Betsy bag in turquoise (to hold all of my gear)
Canon 60D (and Canon Digital Rebel XT)
Speedlite 580EX II
Canon EF-S 18-55mm f/3.5-5.6 II Kit Lens
Canon 50mm f/1.8 II
Canon 70-200mm f/4 L Telephoto Zoom Lens
Neutral Density Graduated Filter for both the telephoto and 50mm lenses
2 tripods

and the most recent addition:

Canon 24-70mm f/2.8 L II Standard Zoom Lens


I wasn't incredibly impressed with my most recent addition, but (to its defense) I was looking for a wide angle lens. I was worried when it said "standard zoom", but I assumed anything bigger than a 50mm would work. Not so much. I failed to realize I already had something wider than a 50mm in my kit lens. Despite my disappointment, I decided to keep the lens. As Justin reminded me, I got the lens (brand new) for nearly $1000 off the asking price and it will be a good (standard) lens for that time in the far, far, far future when I can upgrade to a 5d Mk II or III.

Before I go to Europe, I'm planning on rounding out my camera collection with:

Tokina 11-16mm f/2.8 AT-X116 Pro DX Digital Zoom Lens (for Canon)
Rogue Flash Gels Color Correction Filter Kit
Polarizer Filter
small, light tripod for travel use

I think after that I will be able to shoot in any given situation and achieve what I want. I will be able to shoot in fairly low light at a wide variety of distances. Best of all: I'll have my husband to help carry my equipment. I'm so glad I bought a turquoise camera bag; it will go so well with his eyes! ;)

Hope everyone has a good weekend!

Also, if you have any suggestions for traveling with camera equipment or what you think I should buy next, let me know in the comments!!

Don't you just love Digital Rev reviews?! :)


** A January Break using prompts from The Idea Room's Photo-A-Day Challenge. Feel free to join in!

My Top 3 Favorite Photos of 2013


My challenge for today was to consider my top three favorite photos that I have ever taken. Due to the great hard drive crash of 2013, my choices were fairly limited to images shot this year. Luckily, I have taken a few that I am proud of and do not mind posting again.

1. Sunset at Biltmore – Taken at sunset while stalking the Biltmore Estates, I love this Christmas scene. I almost feel like parts of the image look illustrated and not real. I can't imagine a more beautiful sunset to have captured of this beautiful historic home.
2. Atlanta View – For Justin's birthday we celebrated by taking a walk around Atlanta and discovering the many views of the city. This lingers behind as one of my favorite shots from the day taken with my cell phone! I used old editing techniques to bring this image to life, but I still come back to it frequently as one of my favorite shots of the year. Would it be better with any new editing techniques I've learned? Perhaps. It's hard to say.
3. Charleston Florals – This image was taken over the summer during a vacation to Charleston most likely inside a hotel. I took the image using old camera techniques and edited it using newer editing techniques, which I feel really gave this image the sense of beauty I was seeking and unable to achieve with older techniques. Is it as interesting as the architectural shots above? No. I still think it would be beautiful as a large canvas print hanging in someone's house though.
In the spirit of the holidays, if you find one of my original blog posts featuring any one of the above images, be the first to leave a comment below and I will send you a printed copy of your image choice. :)

Hope everyone is having a fantastic Monday! :)


** Check out 31 Days of December Blogging prompts here!

Ten Steps for Taking Amazing Shots During the Golden Hour


My absolute favorite time of day is during the "golden hour" when the sun is setting. (I know that typically the sun rising is also considered "golden hour", but I like my sleep!) I've been practicing photographing during sunsets recently, and I thought I would share a few things I've learned.

1. PLAN!

Sunsets typically creep up on people. One minute it is a beautiful afternoon and you are out running errands, working in the yard, playing with the kids or dog, or doing whatever it is you like to do during the afternoon. Before you know it, the sun is setting and your camera is…where? Obviously not with you! My camera is never nearby during a pretty sunset! It's usually an ugly sunset if I'm all set up to take a picture of it!

But let's assume it's a gorgeous sunset and you have your camera nearby…

Look around you. Are your surroundings pretty? There you go. That's two things you need to plan for before taking a sunset shot. If I'm shooting a sunset, it's usually because I have a camera. Rarely do I have a great location. I love having a plan and being at the perfect place to shoot at the perfect time. Having a strong location and your camera with you is needed to undergird* an amazing sunset shot.

2. Set your ISO down. As in waaaaaayyyyyyyyy down.

I like shooting at 100 ISO when I can. Canon has this crazy amount of noise when you go above 800 ISO on my camera. Newer cameras have less noise at higher ISOs, but until I become rich I am shooting with my out-of-date but still new-to-me 60d with lots of noise at high ISOs. (I've heard Nikon's don't have much noise at high ISOs.)

3. While you are at it, take your aperture down too.

An aperture at f/22 won't let in nearly as much light, but it will make your image much clearer, especially if you are shooting both foreground and background. You want your camera to drink in the light… not gulp it!

4. Now slow your shutter speed waaaaayyyyyy down too.

With your ISO down and your aperture down, your images will come out pitch black unless you slow your shutter speed down too.

Fun story: Over the weekend as I was shooting the Biltmore Estate, I mentioned to Justin that I was worried about holding a filter next to my camera while using a slow shutter speed. Nearly everyone that was shooting the same scene as me looked at me like I was crazy. Apparently it is a foreign concept for a photographer to use a slow shutter speed at night. They were all using high ISOs, and I'm betting they were getting grainy images because of it.

5.  Use a tripod.

Not using a tripod with a slow shutter speed is just asking for motion blur.

6. I recommend using bracketing if your camera has that option.

Bracketing will increase the likeliness of you getting the correct exposure with light shifting constantly during a sunset.

7. Buy a Neutral Density Grad filter.

An ND Grad filter has "black" glass on top and clear glass on the bottom. Basically it adds a stop to your sky, if you put the dark portion over your sky, which will make the sky look more saturated and detailed.

8. Use your camera's self-timer.

It will help with your slow shutter speed. The last thing you want to do is knock the camera accidentally while it is taking the picture.

9. Be patient and take lots of pictures.

The more pictures you take, the more likely you are to get a good shot. (I.e. getting the sky *just* right.)

10. Have fun!

I hope my ten steps help you to take amazing sunset shots!

Did I miss anything on my list? Let me know by leaving a comment!

Keep an eye out for a post by the end of this week. I have some Walmart 8x20 $5 mounted photo coupons to giveaway (along with some other surprises), and I know that would be awesome to have for all of those sunset pictures you will now be taking because of my list! :)


Word of the day.
** This post is thanks to NaBloPoMo, offering bloggers tips on blogging, monthly blogging prompts, and chances to win prizes! :)

August Break Day 14: Stillness

"I believe the nicest and sweetest days are not those on which anything very splendid or wonderful or exciting happens but just those that bring simple little pleasures following one another softly, like pearls on a string."
- L.M. MontgomeryAnne of Avonlea  

See that fish looking at you?


That's how I feel today. I haven't slept well in the past few nights. Clearly my body just likes starting the day at 3AM. :(

Yep. That must be it. Plus, I am very excited that I'll get to announce the winners of the Purex fabric softener sheets giveaway today (or in the very near future)! (Make sure you get your comments in!) Yay! :)

And if you are into photography as much as I am, you might also be happy to know that Lindsay Adler is going to be back on Creative Live again today. (She was there Monday and Tuesday as well with an awesome session on shooting in bad lighting.)

Here are a few more bullet points and fun facts about my life and the world in general:
  • I just finished reading Julie Powell's Julie & Julia and it was an awesomely fun read making me super excited about Julia Child recipes I had no interest in before. Whether I actually convince Justin to make them and whether or not I actually eat them are a whole different story. (Just not sure I can wrap my head around consuming duck...)
  • Alton Brown's pot roast recipe is AMAZING. You simply have to try it.
  • Where were these awesome polaroid magnet save-the-dates when I needed them? I'll admit vintage postcards was totally fun and something I would love to try again, but polaroid magnets are also pretty awesome. I will have to DIY these sometime soon. (Too expensive for me to buy when I know how to make them without help. The envelopes that come with them are super cute and almost convincing enough to fork over a few bucks though!)
  • Did you know that if you want to use GOES (Global Entry for travel) you have to sign up way far in advance because they have a backlog for interviews? Yeah, I didn't either. I will be signing up asap. Here are a few other interesting facts about GOES for those of you traveling in the near future.
  • I also was unaware until recently that you have to call specific post offices and make an appointment during their office hours in order to get a passport. Call me crazy, but I thought you could just walk into any old post office. Now Justin and I have to wait one more month to get our passports. GRRR!!! (And not as in Tony the Tiger's Grrrr. . .eeeeaaaatttt!!)

Hope your week is going well! Only 2 more days!

A Day In the Life Of... Summer Photography Lessons


A day or so ago, as I was working on the image above and the many variations I've worked with this week, when Justin decided he would give it a shot. I had been groaning that we had screwed up the above panorama by not shooting consistently, and now I didn't know if I would have a chance at getting the sky (and water) to match in color. Mr. Computer Geek thought he'd be able to figure it out and that "it should be easy".

Two hours later he was about to kill my computer.

Or photoshop.

I'm not clear as to which.

The above shot, which is not completed, was put together with a minimum of at least 6 images. I have at least 20 of this area which I am currently working with. We shot using bracketing. One or both of us thought it would be intriguing to do an HDR panorama. Let me just say that I learned my lesson. Shoot using one aperture, one iso, and one shutter speed. (I'm not sure which one we screwed up. Probably shutter speed.)

I guess that's the thing though. You learn through trial and error (+ correcting your mistakes). Unfortunately (or fortunately) I am stubborn enough that if I want something to work, I will make it work. You can bet that I will see this image through. I will work it and work it and work it until something awesome happens. In the meantime, I have learned quite a few things from this summer's crazy shooting sessions.

Here are a few:

1. When shooting a panorama, shoot on manual. Playing with the settings in manual to achieve bracketing and shooting half a dozen times or more will result in a much more consistent image and require less work in photoshop afterwards.

2. As obvious as it may be, stay in ONE SPOT while shooting panoramas. It's crazy seeing how things change when you shift from one position to the next. It also makes it hard for photoshop (and yourself) to put images back together.

3. Manual focus is not as scary as it seems. After screwing up a bunch of auto focussed fireworks this summer at twilight, I decided to give manual a go. Since then I have found that manual focusing is more likely to give me guaranteed results in comparison to automatic when lighting is limited. (Don't get me wrong though: Using a tripod and having patience are definitely the key to this approach.)

4. Shoot more shots of a scene than you think you need. You have no idea how much this has saved me. I literally shoot until I am tired of a scene ... and then I shoot some more. There are two reasons why this is beneficial. The first is that you are able to become more in tune with your subject. You begin looking at the object differently. You see lines, shapes, colors ... and you also notice little things that might be screwing up your shot. (Is that a piece of trash in the grass behind that beautiful flower?) Secondly, when you finally get to the computer, you will also notice things you didn't when taking the image. When you looked at your camera screen did it look like all 5 people had their eyes open and were looking at the camera (as opposed to picking their nose or some such silliness)? Well, guess what? Someone was squinting. It's a good thing you got that second (or third or fourth) shot. (Plus, it's super awesome to use multiple images in photoshop to cut people out of scenes when they are blocking that super awesome monument you shot.)

Of course I should also mention, with regards to shooting a ton, that you don't have that option when shooting with film. I think with film you should take a completely different approach. Usually slow and steady is the way to go. Plan, look, plan, look, plan, look. Only shoot when you know you have your ideal shot. And then shoot a second or third time using the same method of planning and looking. You have even less ability to correct an image shot with film than you do with digital.

5. Don't be afraid to direct people in the scene you are shooting. I'm always afraid to speak up, but even if people don't listen or know how to follow my directions, if I at least try to recommend what they should do, the images typically turn out better. In all honesty, no one knows better what you are trying to shoot than yourself. They can't read your mind. A little direction goes a long way.

I'm grateful for all of the opportunities this summer to get out of the house and spend time with my camera. It's true that the more time you spend shooting, the more you learn and the better you become.

*mini rant* Of course the more I shoot the more I hate people who say "you can just fix it in photoshop later." If I wanted to fix it in photoshop later, why would I bother fixing it now? Or even moreso, why would I bother shooting it to begin with? Why not just create the scene in photoshop from scratch since that's what you want me to do anyway? *end rant*

Taking photos is a bit like taking notes. You take the best photos you can, and then you expand on it later.

JoTotes Review

On Wednesday I received my very first long-awaited JoTotes Betsy bag. I've been wanting one for over a year, but I didn't want to pay the hefty $100+ price tag. With a wedding looming in my future, I knew I couldn't rely on Justin's pockets to hold all of my lenses, camera batteries, memory cards, and flash. I bit the bullet and bought the Betsy bag in teal.


Over the past year, I really and truly wanted the yellow Betsy bag. I thought it would be fun and brightly colored. However, since yellow and black are Georgia Tech colors, and I am completely anti-Georgia Tech (Go Bulldogs!), I bought turquoise instead. I would have worn all black to the wedding I was going to shoot a la professionalware, and, as stated before, clearly yellow and black should never be worn together! Nobody in my family saw it as odd that I would order turquoise since that tends to be my go-to anyway.

When you are seeing this brightly colored turquoise bag online, I can guarantee you that the color you see is what you will get (unless your monitor or phone settings are completely whacky!). The turquoise is truly a bright color and not at all muted in any way.

If you aren't a fan of turquoise though, don't despair. The Betsy comes in a variety of colors, specifically yellow, black and brown. You can have an exciting brightly colored bag or something more normal. It's all up to you!

The bag comes in a cardboard box that says "Your Special Delivery" which, frankly, reminds me of babies and cowboys. It's the font, I promise! Then when you open the box. . . you know those things the nurses wear at the hospital on their feet? Yeah, there's like a big one covering the JoTotes bag. Why? I don't know. The branding seems to be all over the place and not consistent. Plus, what is the box going to do to the bag? Why can't it just be wrapped in packing paper? Or nothing? It would be way more exciting to have it wrapped in packing paper; it'd be like opening a gift! Because honestly, when you order a $100+ bag, you kind of want to feel like you are opening a gift. Plus, would it really be so difficult to put a little "Thank you for shopping with JoTotes" handwritten note in there? That would have totally sent me over the moon in happiness! (I was already pretty excited to begin with!)

Needless to say, the customer service I received prior to ordering my bag was sub-par as well. They were decently quick to respond to my concerns (5 hours). Their e-mail was very impersonal though, and it ended up confusing me more than helping. Apparently they have one standard shipping method they will use unless you contact them immediately after purchasing, send money to them through paypal, and let them know you want 2 day shipping. Why this is not an option upon checkout, I have no idea. An e-mail that expresses excitement and interest in me as a customer would have been nice. Even sending me a link to pay the special 2 day shipping fee in the response would have been nice. (JoTotes, are you listening?) Overall, ordering was confusing, and I recommend going through a site like B&H instead. B&H does not promise 2 day shipping, and actually state that they get their bags from elsewhere, and it could take as many as 7 days extra. I appreciate the honesty and directness from B&H. I do have to mention that JoTotes was correct; I did receive my bag within 3-5 days. 4 to be exact.

Let's get back to the bag. . .

The bag is faux leather and awesome. It came with two straps, one longer and one shorter, three short and one long inner adjustable pad with velcro for easily moving around inside the bag, and a removable shoulder pad. I didn't like that I had to put everything together, but, at the same time, it made the bag seem completely customizable to my own preferences. After many years of using free/cheap computer/camera bags, I have fallen in love with this bag. You don't know what you are missing until you get a well made quality bag that actually sits on your shoulder and doesn't hurt. In the past I've had a lot of problems with the weight being off balance. When the weight on your shoulder is off balance, it hurts. so. much. While this bag will not fit my laptop, I can definitely see myself getting a separate bag from JoTotes for just that purpose sometime in the near future.


The inside of the bag is grey. Like I said, it has three removable grey pads and one large removable grey pad to help you separate your gear and keep it safe. I currently have all of my manuals in the larger pocket, my 50mm, flash, and 60d with telephoto lens attached all fitting nicely in the bag with room to spare! Other photographers have had success also fitting a small 13" laptop in the bag as well. If you have a larger laptop, like me, you should not expect it to fit. I always worry about making bags too heavy for me to comfortably carry, so the prospect of having two bags and only carrying the one I need (i.e. camera equipment or laptop) seemed like an ideal scenario for me. There was definitely room in the bag had I wanted to put my canon xt in there as well.

In case you hadn't noticed, this bag has a LOT of pockets! With two pockets on the front exterior, one in the back, and one in the top, you definitely have room to put all of your stuff! I've got my camera batteries and memory cards in the front pockets, but I have seen where other photographers tend to put keys and cell phones in those pockets. The back pocket is, according to the JoTotes website, large enough to hold an ipad, although I don't have one to try this with. I could imagine using that top pocket for paperwork; it seems made for it.

One of the best things about this bag is that it doesn't scream "I'm a camera bag!". It probably is more likely to scream "I'm a purse!" which is not much better when dealing with thieves, but it definitely feels more conspicuous and less attention drawing. However I would be lying if I implied in any way that this is a small bag. Perhaps it's my petite frame, but this bag is indeed a big bag. It drives me crazy that it is so stiff and won't fold in on itself fitting closer to my body, but it is nice that I don't have to worry about the bag falling over when I set it on the ground. And in case I haven't mentioned it before, I love that I can wear the bag either on my shoulder like a purse or I can go for the cross body fit when I'm busy taking pictures and I don't want to worry about the bag falling off of my shoulder. (Of course, I also have a husband for that, but JoTotes did a wonderful job thinking about those single ladies or the ones that don't have a husband following them everywhere!)

Would I recommend JoTotes?

ABSOLUTELY. Go buy one. yesterday.

If you don't like it, they have a 30 day, unused bag return policy. What do you have to lose?

The Rain, Budget + Food


One of my favorite times to photograph is right after a rain storm. The sky is cold, dark, and sad making everything else seem over saturated; the colors just pop.


Plus, I absolutely love shooting flowers (or leaves) with the little water droplets on them. Justin was amused I was abusing my powers of telephoto lens and pretending it was a macro lens when I was taking this picture.

Over the weekend, the wedding shoot I was planning and prepping for canceled on me. It was frustrating in that I had made a few purchases I would not have made otherwise including my lovely new 60d. I'm excited that I will have awesome equipment for taking on the many vacations that Justin and I have coming up, but, because of said extra expenses that we could not afford, Justin and I decided to attempt to conquer our food budget goals. (That was the only area we felt we could really cut down on.) We went on a trek to a bunch of food places to see where we could find food the cheapest.

The one place we wanted to go, The Restaurant Depot, was closed due to a power outage, so we traveled on to Costco. While at Costco, we found 2 whole (young) chickens for $10. Apparently, one chicken is that price at the Farmer's Market. We bought the chickens yesterday thinking that maybe if we include more meat in our diet, we will be better able to buy in bulk and save money on our overall grocery budget. For the past year our diets have consisted of mostly fresh vegetables (not always on sale) and only rarely would we include meat of any kind. I'm hoping that by being more inclusive of meat, Justin and I will be able to expand our meal options without expanding our budget.

Just before heading home, we did, inevitably, stop by the Farmer's Market to get some fresh vegetables and yogurt.


(Julia Child always says to respect your food. I'm not quite sure how cutting up a chicken is being respectful, but, if anyone was respecting it, Justin was. I would probably have been doing my best to not even touch it!)

Personal lessons I took away from this weekend:

1. Don't buy equipment until you have a signed contract. Verbal agreement is not an actual agreement even a week before said shoot.

2. My photography is worth something. The time and effort I have spent perfecting my skill is really showing through with my new camera. All of a sudden, getting a good shot is almost effortless. Rather than struggling to get the right shot, I get to worry about perfecting the right shot. It takes one's photography into a totally different ballgame.

3. Food is expensive, but two chickens provide a lot of meat.

Lessons you should take away from this:

1. Don't ever let close friends and family shoot your wedding. The lady I was going to shoot for decided to go with her son-in-law. I can almost guarantee you that the photography will suck if she gets it back. I have been to two weddings where this has happened and both couples were glad someone else (me) was there to take images. In the first wedding, the friend ran off with the images never to be seen or heard from again. In the second scenario, the photographer provided the images, but they were all blurry. Do you really want either of those situations to happen to you?

Here's what you don't know about photography. The time you are paying for goes to preparation for your shoot, shooting you, and then editing afterwards. Preparation for your shoot begins the minute your photographer first touches a camera. Hopefully, they have had a mentor in their life to guide them and help them develop their skill. Preparation also usually includes the equipment needed: a computer with Adobe Photoshop or Lightroom, a DSLR camera, a flash, lenses, other various equipment, and a website to share your images with you. After your shoot, you can expect any number of things to happen including color adjustments, sifting through images so that you only get the very best, and small edits that clean up your pictures. Your photographer probably even knows (and has researched) the very best places to get your images printed or designed into an album. So unless you know photoshop, you are getting a pretty good deal by choosing a photographer.

2. Always let your husband cut up the chicken. ;)

So there you go. In a nutshell, that was my weekend (and rant about photography).

Canon 60d

After the realization yesterday that I only had one week to prepare for the biggest shoot of my life (thus far), Justin and I went out last night to Fry's Electronics for me to look at both the 7d and the 60d. At nearly $500 price difference in the store with no price matching, Justin and I decided it would be best for me to go ahead and purchase the 60d which would allow me time to play with it and get used to it. The money I would be saving by not purchasing the 7d could be used to obtain a lens from KEH. 

taken with iphone 4s

I'm already in love.

taken with 60d

I told Justin that if I brought the camera home, tried it, and didn't fall in love within the first day, I was going to return it. I've had that experience every time I go to buy a new camera lens, and I didn't think the purchasing/upgrading of a camera body should be all that different.

When we got home at 11PM last night, I practically ripped the box open, hoping that once I got it open I could immediately start taking pictures. Unfortunately, yours truly forgot that things like batteries are actually important for cameras. I had to wait until we had finished dinner to even think about trying the camera. (Yes, we ate dinner at 11PM last night.) While I worked on putting together a contract, Justin played with my camera. Yes, he got to play with it first. :( I would have liked it if we could have swapped places. :)

Either way, from the moment I put my favorite lens on the camera, I was in love. Shooting with 18.8 megapixels and a camera body that works better in low light settings is making me really happy. After shooting with an 8 megapixel camera and trying to improve my skills with it for over 10 years, it was time for an upgrade.

As we were leaving Fry's, Justin and I spotted a fair.


He pulled over and let take the picture above. I made him promise to bring me back over the weekend to let me shoot with my new 60d. Fairs always intrique me with their carousels, ferris wheels, and cotton candy. It's one of my very favorite places to photograph. And when the sun is setting? Beautiful.

Justin and I have a busy weekend planned with a trip to KEH to look at used wide angle lenses, dinner with the parents and in-laws tonight, and, hopefully, an adventure worthy of being photographed. Do you have any awesome weekend plans?

Photography Equipment: 1 Week + A Few Days!

With one week to go, I have quite a bit to do in preparation for my first solo wedding shoot.

First there is the paperwork:
- Tonight I send out the contract. I have to make sure both my client and I are legally covered.

Then there is the equipment:
- I'm trying to decide between the Canon 60d and the Canon 7d. Wikipedia says the 7d is more professional and I would be able to trade my CF cards between that camera and my XT. Also, the 7d can take up to 8 images per second in comparison to the 60d which shoots 5 images per second. Unfortunately, the 7d is heavier (I need to start lifting weights!), and it also costs about $200 more. Perhaps I'll go inspect both cameras this weekend.
- My 50mm lens is broken, so I need Justin to take it in to get it fixed. (I'm so glad I have a husband that can fix my electronics!)
- I'm also not sure if I'm going to get any other lenses to go with my new camera body, assuming I get one of course. Macro? Wide Angle? Can I have it all?!?!? Please? ;)
- Justin says I should get a reflector. He's probably right.
- I should probably get a camera bag. Man, this month is getting expensive!

Finally I have to find a company to host my images, so that my client can buy my images from me. Every photographer I've ever worked with has used Smugmug, but I just don't like them all that much. We'll see.

I guess I am just super excited that Justin agreed to let me get a new camera body. We can't really afford it, but with trips coming up to NYC and Germany, it will be nice to have. Plus, Justin can use my old camera, so that we both can just go out shooting. New hobby for him? ;)

Speaking of going out shooting, I recently discovered the app Central Park (Listen to the Light) where, as you are walking through Central Park in NYC, the app will play classical music specific to each location. Can you imagine listening to the app while taking pictures? *sigh* Dream. come. true.